Stop Settling for Mediocre Restaurant Appetizers
Stop settling for mediocre restaurant appetizers. Furthermore, forget those overpriced, underwhelming cheese sticks that arrive lukewarm at your table. Homemade Garlic Cheese Fingers deliver everything those sad imposters promise but never achieve: crispy golden edges, molten cheese centers, and an intoxicating garlic-butter gloss that makes your kitchen smell like heaven.
Here’s the truth: making Homemade Garlic Cheese Fingers at home isn’t just cheaper—it’s dramatically better. Moreover, you control every variable that restaurants get wrong. Consequently, you get fresher ingredients, perfect timing, and cheese that actually stretches when you bite into it.
Why Homemade Garlic Cheese Fingers Beat Restaurant Versions Every Time
Restaurant cheese fingers are a scam. Additionally, they’re often pre-made, reheated disappointments that cost $12 for what amounts to leftover pizza dough and processed cheese. In contrast, your homemade version uses quality mozzarella that actually melts properly.
Critics might argue that making them at home takes too much effort. However, they’re dead wrong. Furthermore, with store-bought pizza dough, you’re looking at 35 minutes from start to finish. Meanwhile, delivery takes longer and costs three times more.
The magic lies in proper technique and timing. Specifically, high heat creates crispy edges while keeping centers pillowy. Additionally, fresh garlic butter—not some industrial garlic powder mixture—delivers the aromatic punch that makes these irresistible.
Most importantly, you can customize everything. Consequently, spice lovers can add chili flakes. Meanwhile, herb enthusiasts can load up on oregano. In fact, every batch can be different based on your mood.
The Foolproof Method for Perfect Homemade Garlic Cheese Fingers
Forget complicated recipes with fifty ingredients. Instead, this streamlined approach focuses on technique over fussiness. Moreover, it works whether you’re using homemade dough or the store-bought variety.
First, understand that timing is everything. Additionally, preparation prevents disasters. Therefore, gather all ingredients before heating your oven. Furthermore, this prevents the dreaded scenario of burnt edges while you scramble for missing cheese.
Heat and prep: Set oven to 220°C/425°F. Meanwhile, line your baking sheet with parchment paper. Additionally, lightly oil the surface to prevent sticking disasters.
Shape with confidence: Use 300-350g pizza dough. Roll into a 10×14-inch rectangle. However, don’t obsess over perfect edges—rustic works beautifully.
Create garlic butter magic: Melt 3 tbsp butter. Then, stir in 2-3 minced garlic cloves, 1 tbsp olive oil, and 1/2 tsp salt. Consequently, you get even distribution and rich flavor.
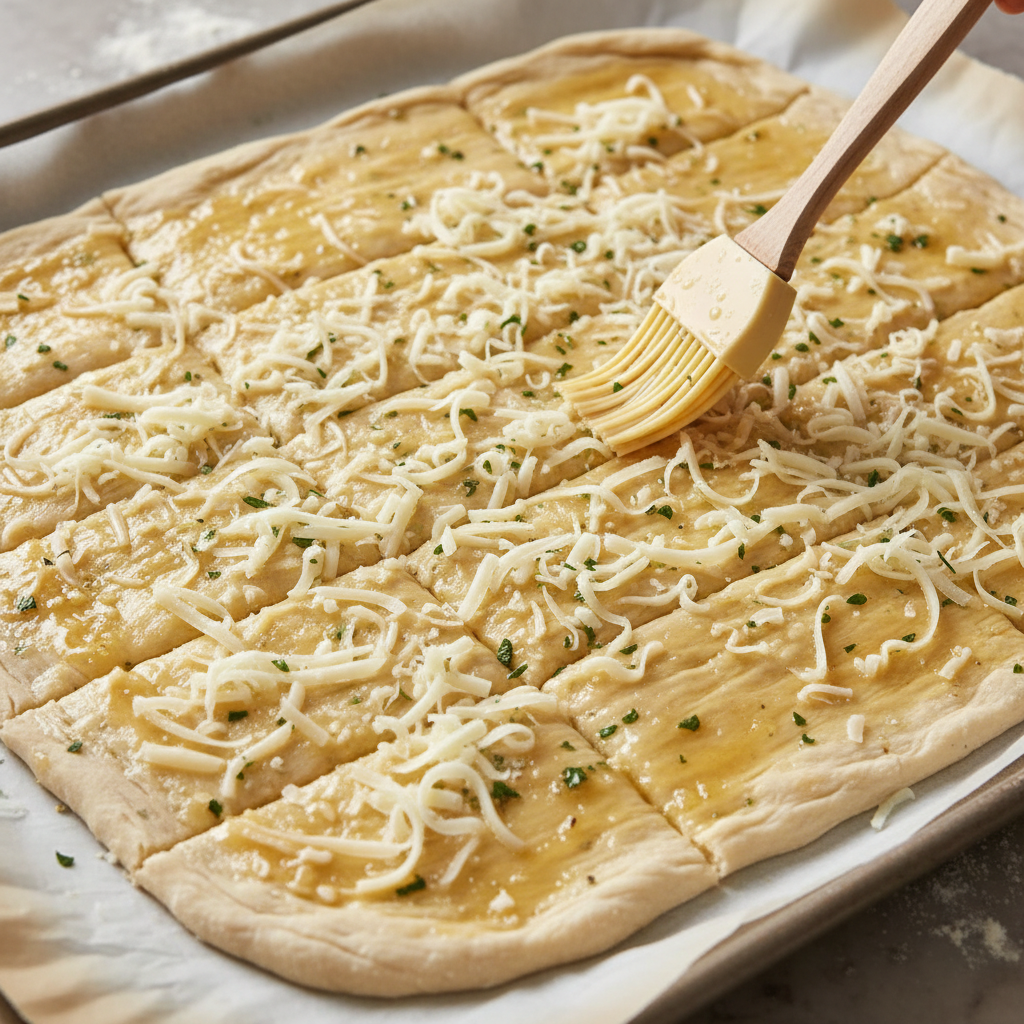
Apply strategically: Brush garlic butter evenly, leaving a 1cm border. However, don’t flood the surface—excess fat creates soggy results.
Layer cheese properly: Sprinkle 1.5 cups low-moisture mozzarella first. Next, add 1/2 cup sharp cheddar for complexity. Finally, finish with 1-2 tbsp grated Parmesan.
Score for success: Lightly mark 12-16 finger lines. This creates extra crispy edges and cleaner slicing later.
Bake with precision: Cook 10-14 minutes at 220°C. Additionally, rotate at 8 minutes for even browning. Meanwhile, watch for golden, bubbly perfection.
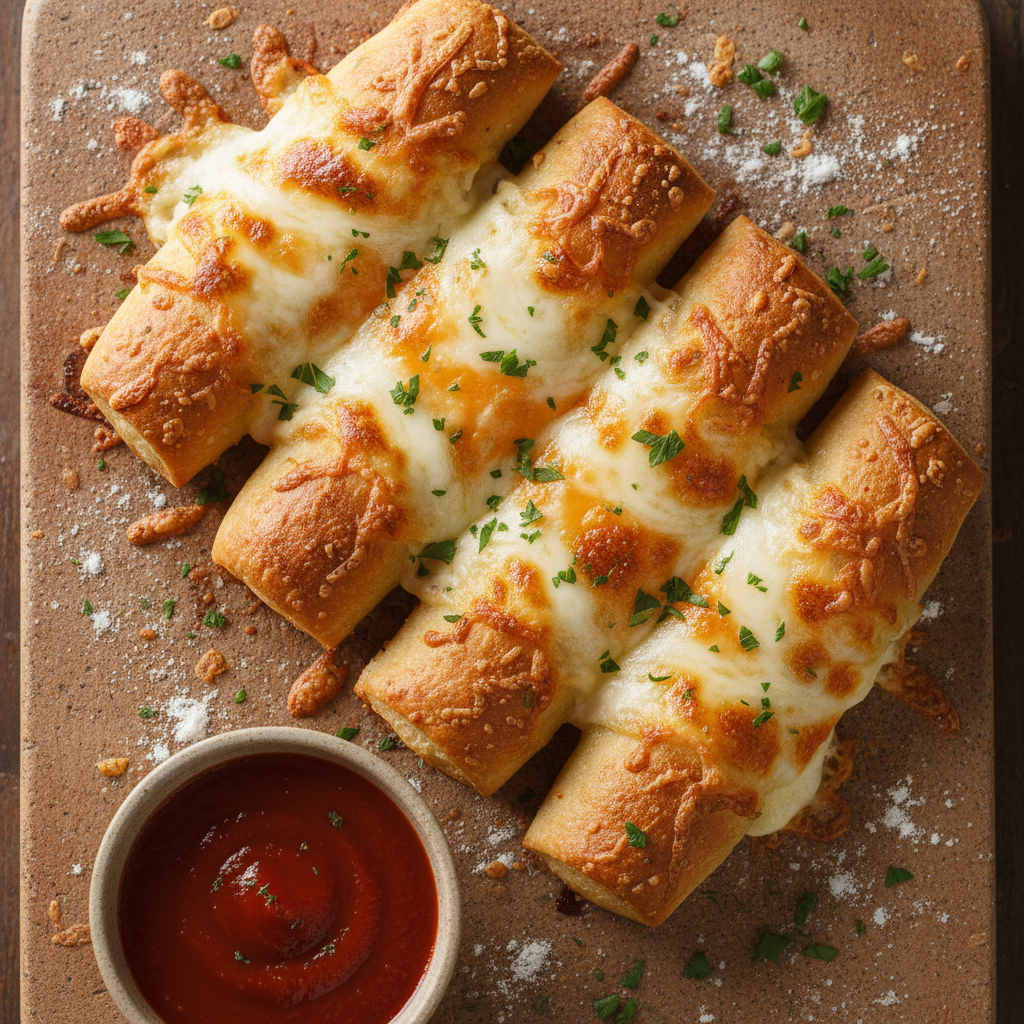
Finish like a pro: Brush with remaining melted butter. Then, sprinkle fresh herbs. Finally, rest 3-5 minutes before slicing.
Professional tip: Bake on the lower rack for maximum crispiness. Furthermore, this positioning delivers bottom heat while cheese melts perfectly above. Consequently, you avoid the soggy-bottom syndrome that ruins inferior versions.
Essential Ingredients for Superior Homemade Garlic Cheese Fingers
Quality ingredients separate excellent Homemade Garlic Cheese Fingers from mediocre ones. Furthermore, each component serves a specific purpose in achieving textural perfection.
- Pizza dough: 300-350g (store-bought saves time without sacrificing quality)
- Unsalted butter: 4 tbsp total (controls saltiness perfectly)
- Olive oil: 1 tbsp (prevents burning, adds richness)
- Fresh garlic: 2-3 cloves, minced (or 1 tsp powder for convenience)
- Low-moisture mozzarella: 1.5 cups, shredded (melts without weeping)
- Sharp cheddar: 1/2 cup (adds flavor complexity)
- Parmesan: 1-2 tbsp, grated (provides savory finish)
- Fine salt and pepper: For seasoning perfection
- Fresh herbs: Parsley or chives for color and freshness
Low-moisture mozzarella is non-negotiable. However, fresh mozzarella looks appealing but creates puddles of water that ruin texture. Therefore, stick with the shredded variety for consistent results.
Smart Swaps and Customizations for Homemade Garlic Cheese Fingers
Dietary restrictions don’t mean flavor sacrifices. Moreover, creative substitutions often improve the original recipe.
Gluten-free option: Use trusted GF pizza dough. Additionally, par-bake 3-4 minutes before adding cheese for structural integrity.
Vegan version: Replace butter with garlic-infused olive oil. Furthermore, use quality plant-based mozzarella plus nutritional yeast for depth.
Heat lovers: Add 1/2 tsp chili flakes to garlic butter. Alternatively, finish with hot honey drizzle.
Herb enthusiasts: Mix za’atar or Italian seasoning into the butter. Consequently, every bite delivers aromatic complexity.
Bacon addition: Scatter crispy bacon bits after baking to maintain crunchiness.
Serving and Storage Strategies
Perfect Homemade Garlic Cheese Fingers deserve proper presentation. Additionally, smart storage extends their appeal beyond the initial serving.
Serve immediately with bold dipping sauces. Specifically, marinara provides classic comfort. Meanwhile, ranch cools spicy heat. Furthermore, garlic aioli doubles down on the theme for true enthusiasts.
Prime pairings: Marinara, ranch, garlic aioli, or spicy honey
Beverage matches: Crisp lager, citrusy seltzer, or zippy white wine
Storage method: Cool on wire racks, then refrigerate up to 3 days
Reheating technique: Oven at 180°C for 7-10 minutes (never microwave—it ruins texture)
Troubleshooting Common Problems
Even experienced cooks encounter issues. However, simple fixes prevent future disasters.
Soggy bottom: Use pizza stone and lower rack position. Alternatively, par-bake dough 3-4 minutes before topping.
Burnt cheese: Move to lower rack or tent with foil. Additionally, reduce broil time to 20-30 seconds maximum.
Bland flavor: Increase salt slightly and finish with extra Parmesan. Moreover, fresh herbs brighten everything instantly.
Sliding cheese: Avoid over-oiling surface. Furthermore, proper scoring creates cheese anchors that prevent sliding.
Consistency comes from respecting the fundamentals. Therefore, maintain even dough thickness, use proper cheese, and embrace high heat. Consequently, your Homemade Garlic Cheese Fingers will rival any professional kitchen’s output.
Nutritional Information and Food Safety
When preparing Homemade Garlic Cheese Fingers, keep food safety basics in mind. Ensure your oven reaches the proper temperature and cheese is fully melted throughout.
For those tracking nutrition, a typical serving (2-3 pieces) contains approximately 250-300 calories, with moderate amounts of protein from the cheese and carbohydrates from the dough. Consider the nutritional benefits of olive oil and garlic’s health properties as added bonuses.
The Bottom Line
The bottom line is simple: restaurant versions can’t compete with fresh, homemade quality. Furthermore, once you master this technique, you’ll never waste money on inferior alternatives again. Most importantly, these Homemade Garlic Cheese Fingers will become your signature crowd-pleaser—the dish everyone requests and remembers.
Additional Resources
Appetizer Recipe Collection – More crowd-pleasing finger foods
Pizza Making Equipment Guide – Essential tools for perfect results
Cheese Melting Science – Understanding why certain cheeses work better
Bread and Dough Techniques – Master the foundation of great pizza dough
Garlic Preparation Guide – Maximize flavor from fresh garlic
For more on Travel Food, check out our other stories.